
Breakfast & Brunch
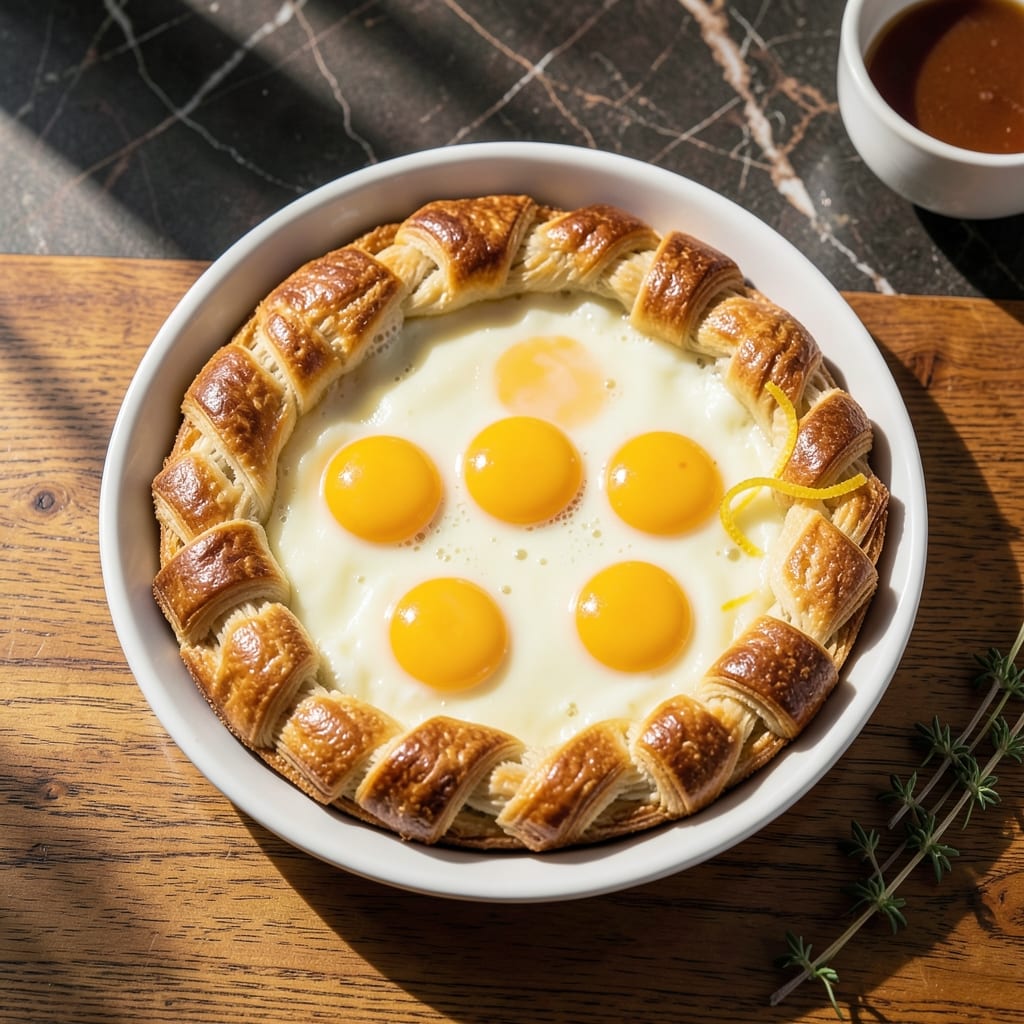
This classic egg tart recipe delivers the perfect balance of crispy, golden shells and silky, custard-filled centers that Singapore bakeries are famous for. The secret lies in a simple shortcrust pastry that bakes to a delicate crunch, paired with a smooth egg custard that stays rich and tender. I've perfected this technique over years, ensuring every bite offers that satisfying contrast between the flaky shell and creamy interior.
The foundation of great egg tarts begins with the dough—lightly buttered and rolled thin, then baked until just golden. While the shells crisp, the custard filling transforms from liquid to velvety perfection, creating those signature silky yolk hearts that make this dessert irresistible. This recipe stays true to tradition while offering flexibility for modern adaptations like adding vanilla or chocolate to the custard.
What sets these apart is the precise baking technique: first the shells, then the custard, ensuring each component achieves its ideal texture. The result? A crispy shell that shatters slightly with each bite, giving way to a custard so smooth it melts on your tongue. These egg tarts are elegant enough for special occasions but simple enough for weeknight treats.
Serve warm with a dusting of powdered sugar or a drizzle of honey for extra indulgence. The beauty of this recipe is its versatility—master the classic version first, then experiment with fillings like matcha or pandan for exciting twists. Let's get started on creating your perfect batch.
Ingredients for classic egg tart
Four ingredients for the dough, six for the custard—simple yet precise for perfect Singapore-style egg tarts.
| Ingredient | Amount | Notes |
|---|---|---|
| All-Purpose Flour 🌾 | 2 cups | Sifted for lighter texture |
| Cold Unsalted Butter 🧈 | ½ cup | Cubed, not melted |
| Granulated Sugar 🍚 | ¼ cup | Fine grain preferred |
| Large Eggs 🥚 | 1 whole | Room temperature |
| Vanilla Extract 🌸 | ½ tsp | Pure vanilla preferred |
| Large Egg Yolks 🥚 | 4 whole | Separated from whites |
| Granulated Sugar 🍚 | ½ cup | For custard sweetness |
| Milk 🥛 | 1 cup | Whole milk preferred |
| Salt 🧂 | ¼ tsp | Fine sea salt |
| Powdered Sugar 🍚 | 2 tbsp | For dusting |
| Vegetable Oil 🫒 | 1 tbsp | For greasing tarts |
The butter is non-negotiable for that signature crispy shell. European-style unsalted butter has higher fat content, which gives you that delicate flakiness. If you're in a pinch, Plugrá or Land O'Lakes European Style work well, but avoid margarine—it lacks the richness. The flour should be all-purpose, not bread flour, to prevent a tough crust. For the custard, large egg yolks are essential—they create that signature silky texture. If you're using store-bought flour, sift it first to avoid lumps in the dough. For the custard, whisk the yolks and sugar until pale and thick before adding milk to ensure a smooth finish.
No vanilla extract? A pinch of vanilla bean paste or even a scraped vanilla pod works just as well. For the custard, if you're short on milk, half-and-half or heavy cream adds extra richness. The custard must be strained through a fine-mesh sieve to guarantee a silky texture—no lumps allowed. For the dough, if you can't find unsalted butter, salted butter minus 1/4 tsp salt will work, but it's not ideal. The custard mixture should coat the back of a spoon when fully thickened—this is your cue to stop heating. If you're making ahead, prepare the dough and fillings separately and refrigerate for up to 2 days.
The dough can be rolled out and shaped into tart shells up to 1 day ahead—store them in an airtight container at room temperature. Once baked, the shells keep well for 3 days at room temperature, wrapped in foil. The custard filling can be made up to 2 days ahead and stored in the fridge. Assemble the tarts just before baking to maintain crispiness. For serving, dust with powdered sugar right after baking to prevent moisture loss. These tarts reheat beautifully—warm in a 350°F oven for 5-7 minutes to restore that perfect crunch.
Why You'll Love This Recipe
- Foolproof Dough: I swear by this butter-flour mix—just cube the cold butter into the flour like you’re making shortbread, then pulse it until it looks like coarse sand. No food processor? A fork works just fine. The key is not overworking it, or you’ll end up with tough pastry instead of that melt-in-your-mouth crumb.
- Golden Custard Magic: That sugar-egg-vanilla filling? It’s where the real magic happens. The sugar caramelizes just enough to give it a subtle sweetness, while the vanilla cuts through the richness. Bake it until the edges are golden and the center still jiggles—trust me, that’s the spot.
- Breakfast or Snack: Honestly, I eat these cold for breakfast with a sprinkle of flaky salt, or warm with a drizzle of honey when I’m craving something sweet. They’re perfect for picnics (no reheating needed), office lunches, or even as a dessert when guests show up unannounced.
- Makes a Bunch: Between us, this recipe yields way more than you’ll eat in one sitting. The good news? They freeze beautifully—just reheat in a toaster or oven. And since the ingredients are basic, you’re not breaking the bank for something this universally loved. My freezer is always stocked.
Step-by-step instructions for classic egg tarts
Here's how to achieve that signature Singaporean combination of flaky pastry and custardy yolk filling.
Prepare the Tart Shell Dough
In a large mixing bowl, combine the 2 cups all-purpose flour and 0.25 cup granulated sugar. Cut in the 0.5 cup cold unsalted butter using a pastry cutter or your fingers until the mixture resembles coarse crumbs with pea-sized butter pieces remaining. This texture is crucial for creating flaky layers in the final tart shells.
Add the 1 whole large egg and 0.5 teaspoon vanilla extract, then mix gently with a fork until the dough begins to come together. Avoid overworking the dough—just combine until it forms a shaggy mass. The cold butter must remain in chunks to create proper laminations when baked.
Form and Bake the Tart Shells
Divide the dough into 4 equal portions (about 1/4 cup each) and roll each portion into a ball. Using your thumb, press each ball into a 3-inch round (about 1/4-inch thick) on a parchment-lined baking sheet. The edges should be slightly thicker than the center to prevent cracking during baking.
Preheat your oven to 375°F. Bake the tart shells for 12-15 minutes until they're golden brown at the edges and just beginning to set in the center. They should still be slightly soft to the touch—they'll firm up as they cool. Remove from the oven and let cool completely on a wire rack before filling.
Make the Silky Egg Yolk Filling
In a medium saucepan, combine the 4 whole large egg yolks, 0.5 cup granulated sugar, 1 cup milk, 0.25 teaspoon salt, and 1 tablespoon vegetable oil. Whisk vigorously until all ingredients are fully incorporated and the mixture is smooth. Place the saucepan over medium-low heat and cook, stirring constantly with a wooden spoon or silicone spatula.
Continue cooking until the mixture thickens to a pudding-like consistency (about 5-7 minutes). You'll know it's ready when it coats the back of a spoon and leaves a clear path when you draw your finger through it. Remove from heat immediately to prevent overcooking, which would make the filling grainy.
Assemble and Finish the Egg Tarts
Once the tart shells have cooled completely, carefully fill each one with about 1/4 cup of the egg yolk mixture. Use a spoon to distribute the filling evenly, leaving a slight depression at the top for expansion. The filling should be just below the rim of each shell.
Bake the filled tarts in a 350°F oven for 12-15 minutes until the filling is set but still slightly jiggly in the center. This ensures that perfect custardy texture when you cut into them. Dust generously with 2 tablespoons powdered sugar while still warm for that signature Singaporean finish.
Pro Tips For Making Classic Egg Tart
- CHILL THE BUTTER FIRST: I learned this the hard way—cutting butter straight from the fridge into flour is like trying to make pastry with sand. Let that butter sit for 20 minutes at room temp, then cube it into ½-inch pieces. The dough will handle better, and your tart crust won’t turn into a greasy mess when rolling.
- USE A THIN ROLLING PIN: A thick pin smashes the dough unevenly, leading to thick spots that burn or soggy patches. Grab a thin pin (or even a wine bottle in a pinch) and roll firmly but evenly, keeping the dough taut. This guarantees a consistent, golden crust—no guessing if the middle’s done.
- WHISK EGGS WELL: Lumpy egg custard = grainy egg tarts. Whisk eggs with sugar until the mixture is completely clear and ribbons form when the whisk is lifted. Add vanilla last, then strain the custard through a fine sieve if you’re paranoid (like me after my first disastrous batch). Smooth custard = melt-in-your-mouth texture.
- BAKE UNTIL THE EDGE CRISPS: Most recipes say "bake until set," but that’s vague. Watch the edges: they should pull away from the pan and turn a deep golden brown. If the center’s still jiggly, crank the heat to 350°F for 2–3 minutes—just long enough to firm up without overcooking. Overbaking turns custard to rubber; underbaking leaves it wobbly.
Troubleshooting this recipe
Dough Too Tough
If your dough feels dense or tough after mixing, you likely overworked it or didn’t keep the butter cold enough. The key is to handle the dough minimally—just until it comes together. Use your fingers to gently press the butter into the flour until you see pea-sized butter pieces remaining. If the dough still feels dry, add 1 teaspoon cold water at a time until it holds together. Never knead it like bread dough—this destroys the flaky layers. 🥧
Shells Cracking
Cracks in your tart shells usually happen when the dough is too thin or the oven temperature fluctuates. Roll your dough to a ¼-inch thickness and use your thumb to press the center slightly thinner than the edges—this prevents uneven expansion. Also, ensure your oven is fully preheated before baking. If cracks appear, don’t worry—they’re easy to fix! Just brush the shells with a little egg wash (1 egg yolk + 1 tsp water) before baking to seal them.
Filling Too Runny
A runny filling means you either didn’t cook it long enough or used too much liquid. The custard should coat the back of a spoon and leave a clear trail when you draw your finger through it. If it’s still thin after 7 minutes of cooking, keep stirring gently over low heat until it thickens. For extra insurance, whisk the egg yolks and sugar together until pale and slightly thickened before adding the milk—this helps stabilize the custard. 🍳
Filling Too Thick
Overcooking the custard is the usual culprit here. Once the mixture reaches 170°F (use a candy thermometer for accuracy), remove it from heat immediately. If it’s already too thick, thin it with 1 teaspoon warm milk and stir gently. For future batches, reduce the heat to medium-low and stir constantly to prevent scorching. The filling should be just set when you cut into it—still slightly wobbly in the center.
Tarts Not Rising
If your filled tarts look flat after baking, the custard might have been too cool when added or the oven wasn’t hot enough. Always use a 350°F oven and ensure the filling is at room temperature before assembling. For extra lift, place the filled tarts on a baking sheet lined with parchment paper and bake them on the middle rack of the oven. Avoid overfilling—the custard should sit just below the rim to allow for gentle expansion.
Burnt Edges
Burnt edges happen when the shells bake too long or the oven runs hot. Keep a close eye on your tarts after 10 minutes of baking—they’re done when the edges are golden but the center is still slightly soft. If they brown too quickly, reduce the oven temperature by 25°F next time or cover the edges loosely with aluminum foil during baking. For even baking, rotate the tray halfway through the cooking time. 🔥
Nutrition facts
Frequently asked questions
Can I make egg tarts without a food processor?
The dough can be made by hand using the pastry cutter method—rub the cold butter into the flour with your fingertips until you see pea-sized butter pieces remain. This creates the same flaky texture without a machine. Just work quickly to keep everything cold.
What's the difference between egg tarts and custard tarts?
Classic egg tarts use whole egg yolks for a rich, creamy filling, while custard tarts often include egg whites (or even just yolks) with a thicker, pudding-like texture. The shells are identical, but egg tarts have that signature silky yolk heart when cut open.
Can I use store-bought pie crust instead of making dough?
Yes, but the texture won't be as delicate. For best results, use a shortcrust pastry (like Pillsbury) and roll it 1/4-inch thick. Bake the shells first at 375°F for 10 minutes to crisp them up before filling. They won't be as flaky, but it's a great shortcut!
How do I store leftover egg tarts?
Keep filled tarts in an airtight container at room temperature for up to 2 days. For longer storage, refrigerate for 3-4 days or freeze for 1 month. Reheat in a 350°F oven for 5-7 minutes to restore crispiness. The filling stays creamy when properly stored!
Why does my custard sometimes curdle?
Curdling happens when the custard overheats or you add cold milk to hot yolks. Always temper the milk by heating it slightly first, then whisk it into the yolks. Keep the heat medium-low and stir constantly. If it starts to curdle, remove from heat immediately and strain through a fine-mesh sieve.