
Breakfast & Brunch
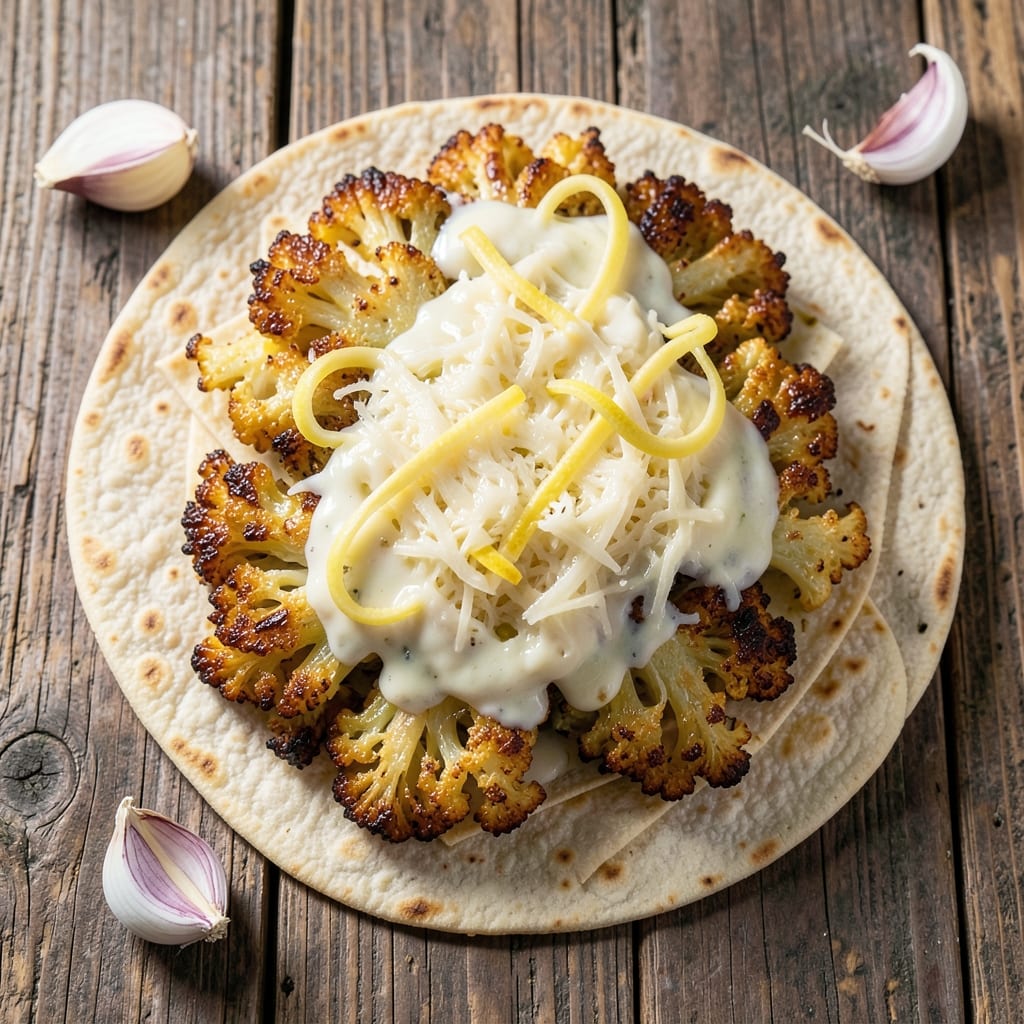
Cauliflower egg wraps deliver the perfect balance of crispy tortilla shells and silky scrambled centers—without sacrificing protein or flavor. This recipe transforms simple ingredients into a satisfying breakfast that's both hearty and light, making it ideal for meal prep or a quick morning meal. The secret lies in properly sautéing the cauliflower until tender yet crispy, then blending it seamlessly with eggs for a texture that's creamy yet sturdy enough to hold its shape when wrapped.
What sets these wraps apart is the technique: cooking the cauliflower filling just until it reaches the perfect crispy edge while keeping the interior tender ensures every bite has the right contrast. The tortillas toast beautifully in the pan, creating a golden shell that holds up to the filling without getting soggy. Seasoning is key—garlic, cumin, and a touch of smoked paprika infuse the cauliflower with depth, while the eggs add richness that ties everything together.
Assembling the wraps is where the magic happens. The filling stays compact and flavorful, making it easy to roll without falling apart, while the crispy tortilla adds a satisfying crunch. Top with fresh herbs, a drizzle of hot sauce, or a sprinkle of cheese for extra flavor—these wraps are customizable for any taste. They reheat beautifully, too, so you can prep a batch ahead and enjoy them all week.
Perfect for breakfast, brunch, or even a light lunch, these wraps are a game-changer for anyone looking to add more vegetables to their diet without sacrificing taste. The combination of textures and flavors makes them irresistibly satisfying, proving that healthy eating can be delicious and easy. Let's get cooking!
Ingredients for cauliflower egg wraps
Eight simple ingredients transform into crispy, protein-packed wraps that taste like a restaurant breakfast.
| Ingredient | Amount | Notes |
|---|---|---|
| Fresh Cauliflower Florets 🥬 | 3 cups | Roughly chopped, uniform size |
| Large Eggs 🥚 | 4 whole | Room temperature for best blending |
| Low-Fat Shredded Cheese 🧀 | ½ cup | Cheddar or Monterey Jack preferred |
| Large Flour Tortillas 🌯 | 4 whole | Low-carb or whole wheat for texture |
| Olive Oil 🫒 | 2 tbsp | Extra-virgin for high smoke point |
| Garlic Cloves 🧄 | 2 cloves | Minced, for aromatic depth |
| Ground Cumin 🌿 | ½ tsp | Toasted for deeper flavor |
| Smoked Paprika 🌶️ | ¼ tsp | For subtle smoky warmth |
| Salt 🧂 | ½ tsp | Kosher or sea salt preferred |
| Black Pepper 🌶️ | ¼ tsp | Freshly ground for best flavor |
| Fresh Cilantro 🌿 | ¼ cup | Chopped, for fresh garnish |
| Hot Sauce 🌶️ | 1 tbsp | Optional, for serving |
| Sour Cream 🥛 | ¼ cup | For serving, optional |
The cauliflower is the star here—fresh florets from the produce section make all the difference. Look for heads that are firm and bright white; the Trader Joe's or Whole Foods brands tend to have the best quality. If you're short on time, pre-riced cauliflower works too (just drain it well). The eggs? Room temperature is key—they blend smoother and create a silkier texture. I always grab large eggs for extra richness, but medium works in a pinch. The tortillas should be soft but sturdy—Mission or La Tortilla Factory are my go-tos, but any large flour tortilla will do.
No fresh cilantro? Dried oregano at half the amount works in a pinch, though it won't have that bright pop. Running low on smoked paprika? Regular paprika plus a pinch of liquid smoke mimics the flavor. The cheese can be swapped for feta or goat cheese if you're feeling fancy—just reduce the amount to 0.25 cup. For extra crispiness, lightly toast the tortillas in a dry pan before assembling. And if you're making these ahead, cook the cauliflower filling first and store it separately—it reheats beautifully without getting soggy.
These wraps reheat like a dream—microwave for 30 seconds or warm in a skillet for 1-2 minutes per side. Store filled wraps in an airtight container with parchment paper between layers for up to 3 days. The filling alone keeps for 4 days in the fridge or 3 months frozen. Pro tip: Portion the filling into muffin tins before freezing—just pop one out, wrap it, and you're good to go. The tortillas stay fresh for 1 week if stored in their package, but once opened, keep them sealed with plastic wrap.
Why You'll Love This Recipe
- No Chopping Needed: I swear, the florets just need a quick roast—no dicing, no fuss. Toss them in olive oil, salt, and pepper, then let the oven do the work while you scramble eggs.
- Creamy Meets Crunch: That first bite? The tortilla stays soft while the cauliflower gets tender-crisp, and the eggs? Perfectly runny in the middle. (Yes, I eat them with a fork sometimes.)
- Lunchbox Hero: Between us, these wrap leftovers are my go-to for work lunches—no soggy mess, just packable protein. Add a sprinkle of cheese, roll it tight, and boom: no reheating required.
- Budget Breakfast Hack: Eggs, cheese, and cauliflower stretch for a crowd, and tortillas? Cheaper than takeout. Honestly, I’ve fed four people for under $10 with this—plus, it’s way healthier than breakfast burritos.
Step-by-step instructions for crispy cauliflower egg wraps
Here's how to create golden tortillas with creamy egg centers—simple, satisfying, and perfect for breakfast or lunch.
Sauté the Cauliflower Until Crispy
Heat 1 tablespoon of the olive oil in a large skillet over medium-high heat. Add the 3 cups fresh cauliflower florets, spreading them in a single layer. Cook undisturbed for 8-10 minutes until golden brown on the bottom—this is your crispy base.
Flip the florets and cook another 6-8 minutes until evenly browned and tender. Add the minced garlic cloves, ground cumin, and smoked paprika, stirring for 30 seconds until fragrant. Remove from pan and set aside—these will form the flavorful core of your wraps.
Prepare the Silky Egg Mixture
In a bowl, whisk together the 4 whole large eggs, 0.5 teaspoon salt, and 0.25 teaspoon black pepper until just combined—no need to overbeat. Add the 0.5 cup low-fat shredded cheese and mix until evenly distributed. This creates the creamy, protein-rich center that pairs perfectly with the crispy cauliflower.
I like to season the eggs lightly here because the cheese and tortillas will add plenty of flavor. For extra richness, you could add a splash of milk, but the eggs are already perfectly balanced as-is.
Assemble and Cook the Wraps
Warm the 4 whole large flour tortillas in a dry skillet for 30 seconds per side until pliable. Place one tortilla in each of four clean plates. Divide the crispy cauliflower mixture evenly among the tortillas, mounding it slightly in the center.
Pour the egg mixture over each cauliflower mound, spreading it evenly to within ½ inch of the edges. Cover each plate with a lid or foil and cook on medium-low heat for 4-5 minutes, until the eggs are just set but still slightly runny in the center.
Finish with Fresh Toppings
Remove the wraps from heat and immediately top each with 1 tablespoon hot sauce (if using) and 1 tablespoon sour cream. Sprinkle with 1 tablespoon chopped fresh cilantro for brightness. The contrast of creamy eggs, crispy cauliflower, and cool toppings makes every bite irresistible.
Serve immediately while the tortillas are still warm and crispy. These wraps keep well for 2 hours if stored in an airtight container, but they're best enjoyed fresh while the textures contrast perfectly.
Pro Tips For Making Cauliflower Egg Wraps
- Roast Cauliflower First: I learned this the hard way—raw cauliflower releases too much water and turns your wrap soggy. Roast the florets at 425°F for 15-20 minutes until golden and slightly crispy. They’ll hold up better and add texture that raw florets never will.
- Whisk Eggs Cold: Room-temperature eggs cook unevenly, leading to rubbery centers. Crack them straight into a cold bowl, whisk vigorously with a pinch of salt, then let them sit for 2 minutes before cooking. The cold start gives you a fluffier, more stable egg base for wrapping.
- Press Tortillas Dry: Wet tortillas = sad wraps. After warming your tortillas, press them between two dry paper towels with a rolling pin for 10 seconds. This step prevents the cheese from turning your wrap into a soggy burrito—trust me, it’s non-negotiable.
- Layer Cheese Last: Sprinkle the shredded cheese over the eggs after they’ve cooked and just before rolling. The heat from the eggs melts it perfectly into a stretchy blanket, sealing the wrap without making it greasy. (Yes, even if you’re impatient like me.)
Storing and reheating this cauliflower egg wraps
Fridge Storage Tips
Store assembled wraps in an airtight container with parchment paper between layers to maintain crispiness. They’ll stay fresh for up to 3 days in the fridge—just reheat in a skillet for 1-2 minutes per side until warm through. The filling alone (without tortillas) keeps for 4 days in the fridge, making it perfect for meal prep. 🥬
Freezer-Friendly Prep
Portion the cooked cauliflower filling into muffin tins or small airtight containers before freezing. It’ll last 3 months—just thaw overnight in the fridge, then assemble fresh tortillas and cook as directed. For extra convenience, freeze the filling in 1-tablespoon portions for single-serving wraps. 🧊
Reheating Perfection
For best results, reheat wrapped versions in a nonstick skillet over medium heat for 1-2 minutes per side—this restores crispiness without drying out the eggs. Microwave reheating works too: 30 seconds covered, then 10 seconds uncovered to crisp the tortilla edges. Avoid high heat to prevent soggy centers. 🔥
Tortilla Freshness
Unopened tortillas last 1 week at room temperature, but once opened, store them in a sealed plastic bag with a paper towel to absorb moisture. For extra crispiness after reheating, toast in a dry pan for 10 seconds before serving. Never freeze tortillas—they become rubbery when thawed. 🌯
Make-Ahead Strategy
Prep the cauliflower filling 2 days ahead and store it separately. On serving day, simply assemble with fresh tortillas and cook as directed. This method keeps textures intact—crispy cauliflower and creamy eggs reheat beautifully. I swear by this for busy mornings! ⏰
Portion Control
For individual servings, wrap each portion in plastic wrap before freezing. When ready to eat, unwrap and cook straight from frozen—no thawing required. This works best with low-carb tortillas, which handle reheating better than standard flour varieties. 💡
Nutrition facts
Frequently asked questions
Can I make these wraps without eggs for a vegan version?
Yes! Replace the eggs with a ¼ cup silken tofu blended with 1 tbsp nutritional yeast and 1 tbsp cornstarch to mimic the binding and creamy texture. Add 1 tbsp aquafaba (chickpea brine) for extra fluffiness. The cauliflower filling will still hold together beautifully, though the texture will be slightly denser than the classic version.
Why did my cauliflower filling get soggy when reheating?
Soggy wraps usually happen from too much moisture or improper reheating. To fix this, pat the cooked cauliflower dry before mixing with eggs, and use low-fat cheese (or omit it). When reheating, always use a dry skillet over medium heat for 1-2 minutes per side—never microwave uncovered, as the steam will make the tortillas limp.
How do I make these wraps spicier?
Boost the heat by adding ½ tsp cayenne pepper to the cauliflower while sautéing, or swap the hot sauce for sriracha or chipotle sauce on top. For smoky depth, increase the smoked paprika to ½ tsp and add ¼ tsp chipotle powder. Pro tip: Mix a little hot sauce into the egg mixture before assembling for even spicier bites!
Can I use pre-riced cauliflower instead of fresh florets?
Pre-riced cauliflower works perfectly—just drain and pat it completely dry first to prevent a watery filling. Sauté it for 5-7 minutes (instead of 8-10) since it cooks faster than florets. The texture will be slightly softer, but the flavor stays just as delicious. This is a great shortcut for busy mornings!
What’s the best way to keep the tortillas crispy when assembling?
Toast the tortillas in a dry skillet over medium heat for 10-15 seconds per side before adding filling. For extra crispiness, place the assembled wraps in the skillet seam-side down and cook for 30 seconds per side** after adding toppings. The key is to keep the heat medium-low to avoid burning the tortillas while the filling cooks through.