
Breakfast & Brunch
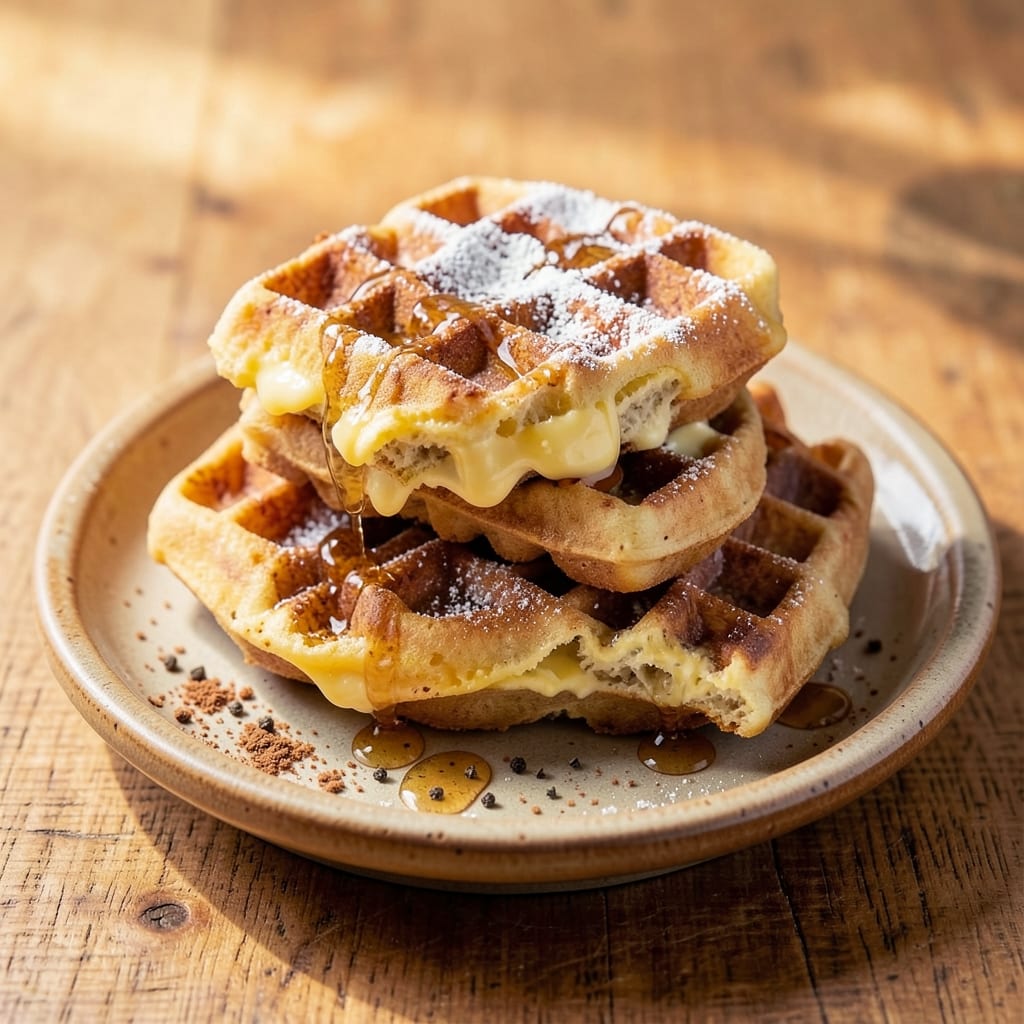
This banana egg waffles recipe transforms simple ingredients into golden, caramelized stacks with a fluffy interior that melts in your mouth. 💛 The magic happens when ripe bananas and eggs combine to create a batter so tender it practically dissolves on your tongue, while the waffle iron delivers perfectly crisp edges every time. I’ve perfected this recipe over years of weekend breakfasts, and it’s become a staple for lazy mornings when you crave something sweet without the fuss of pancakes.
The secret lies in the batter’s texture—whisking the eggs until frothy incorporates air, while mashed bananas add natural sweetness and moisture without making the waffles soggy. A touch of vanilla and cinnamon deepens the flavor, while a splash of milk ensures the batter glides smoothly onto the grid. The result? Waffles that are crisp enough to hold toppings but soft enough to soak up syrup or nut butter with every bite.
What makes these waffles truly special is their versatility. Serve them plain with a drizzle of honey and a sprinkle of sea salt for a balanced sweet-savory bite, or load them up with sliced bananas, peanut butter, and a dusting of cinnamon sugar for a decadent treat. They’re also a great way to use up ripe bananas before they spoil, turning something ordinary into a breakfast showstopper.
Ready in just 15 minutes, this recipe is perfect for busy mornings or weekend brunch gatherings. The batter keeps well in the fridge, so you can make a batch ahead and reheat for a quick, foolproof meal. Here’s how to achieve waffles that taste like they came from a diner—but with none of the wait.
Ingredients for banana egg waffles
Simple ingredients for waffles so fluffy they practically disappear on your tongue.
| Ingredient | Amount | Notes |
|---|---|---|
| Ripe Bananas 🍌 | 2 medium | About 1 cup mashed |
| Large Eggs 🥚 | 2 whole | Room temperature preferred |
| All-Purpose Flour 🌾 | 1 cup | Sifted for fluffiness |
| Granulated Sugar 🍚 | ¼ cup | Or maple syrup for richness |
| Baking Powder 🧂 | 1 tsp | For light texture |
| Ground Cinnamon 🌿 | 1 tsp | Warm, aromatic variety |
| Pure Vanilla Extract 🍯 | ½ tsp | Or vanilla bean paste |
| Milk 🥛 | ½ cup | Any kind works |
| Melted Butter 🧈 | 2 tbsp | Or neutral oil |
| Salt 🧂 | ¼ tsp | Fine sea salt |
| Honey 🍯 | 2 tbsp | For drizzling (optional) |
| Cinnamon Sugar 🍚 | ¼ cup | For topping (optional) |
Ripe bananas are the star here—look for ones with brown spots, not mushy ones. Trader Joe's or your local grocery store usually have perfect ones, especially in the produce section near the front. I always grab extra because they keep for days in the fridge. The eggs should be room temp for a smoother batter—just take them out 15 minutes before mixing. Flour matters too: King Arthur or Bob's Red Mill brands sift beautifully for that perfect lightness. And don't skip the baking powder—it's what makes these waffles rise just right.
No ripe bananas? Use 2 tablespoons of banana puree from a can—it works in a pinch. Out of vanilla? Vanilla bean paste or even a dash of orange zest adds depth. The milk can be any kind, but whole milk gives the best texture. For the butter, if you're vegan, use coconut oil instead—it melts just like butter. And if you're short on sugar, applesauce or mashed dates work too, though the flavor will be slightly different. The cinnamon sugar topping is optional but worth it—just mix equal parts sugar and cinnamon.
This batter keeps in the fridge for 2 days, covered tightly. For longer storage, freeze portions in a sealed bag for up to 3 months. I like to reheat them in a toaster or air fryer for that perfect crispy edge. The waffles are best fresh but still delicious reheated. And if you make extra batter, pour it into a muffin tin for banana egg muffins—they're great for grab-and-go breakfasts.
Why You'll Love This Recipe
- I’ll be real: ripe bananas mash too easily—just smash them with a fork while cracking eggs into the same bowl. That’s it. No food processor, no sticky cleanup, just smooth batter in minutes.
- No Mash Struggle: I’ll be real: ripe bananas mash too easily—just smash them with a fork while cracking eggs into the same bowl. That’s it. No food processor, no sticky cleanup, just smooth batter in minutes.
- Sweet-Savory Magic: The eggs add richness while the flour and sugar balance the banana’s natural sweetness—like a pancake’s cousin but with a crispy edge that holds up to syrup or peanut butter. Honestly, I’ve never met a waffle that works better with both breakfast and dessert toppings.
- Breakfast for Days: Make a batch Sunday morning, freeze the extras, and you’ve got grab-and-go meals for lazy mornings or after-school snacks. My kids grab them straight from the toaster—no reheating, no fuss. (Yes, even on a Tuesday night.)
Step-by-step instructions for banana egg waffles
Here's how to make these fluffy, caramelized waffles—no flipping required!
👨🍳 Step 1: Mash the Bananas and Mix Wet Ingredients
Start by mashing the 2 medium ripe bananas in a large bowl until completely smooth—no lumps allowed. Add the 2 whole large eggs, 0.5 cup milk, 2 tbsp melted butter, 0.5 tsp pure vanilla extract, and 0.25 tsp salt. Whisk everything together until fully combined and slightly frothy.
I like to press the mashed bananas through a fine-mesh sieve to remove any stubborn skin bits. This ensures your batter is ultra-smooth and your waffles come out with that perfect, even texture. The mixture should look like a thick, creamy batter—almost like pancake batter but with banana's natural sweetness.
👨🍳 Step 2: Combine Dry Ingredients and Fold Gently
In a separate bowl, whisk together the 1 cup all-purpose flour, 0.25 cup granulated sugar, 1 tsp baking powder, and 1 tsp ground cinnamon. Sift the flour first if you can—this prevents lumps and gives your waffles that light, airy texture.
Now, gently fold the dry ingredients into the wet mixture using a spatula. Be careful not to overmix—just combine until everything is evenly distributed. The batter should be thick but still pourable. If it's too thick, add a splash of milk 1 tablespoon at a time until it reaches the right consistency. This is your secret to fluffy, not dense, waffles.
🔥 Step 3: Preheat and Prepare the Waffle Iron
Preheat your waffle iron to medium heat—about 350°F. The exact temperature can vary by brand, so check your manual if you're unsure. Lightly grease the plates with a bit of butter or oil to prevent sticking. I like to use a paper towel to rub a tiny bit of melted butter on the plates—just enough to coat them lightly.
Here's the thing—don't skip the greasing, even if your waffle iron claims to be nonstick. The natural oils in the batter can still cause sticking, especially with banana's moisture. A lightly greased iron ensures crispy edges and easy release. Let the iron heat up fully before adding the batter—you should see steam rising when it's ready.
🍳 Step 4: Cook the Waffles to Golden Perfection
Pour about ½ cup of batter onto the preheated waffle iron. Close the lid and cook for 4-5 minutes, or until the waffles are golden brown and the iron stops steaming. You'll know they're done when the edges are crispy and the center feels set—no more jiggly batter.
I press down gently on the waffle with a spatula during the first minute to help it cook evenly and prevent it from puffing up too much. Don't open the lid early—this can cause the waffle to stick. If the top browns too quickly, reduce the heat slightly for the next batch. Serve immediately while warm for that perfect caramelized texture.
🍽️ Step 5: Serve with Honey and Cinnamon Sugar
While the waffles are still hot, drizzle them with 2 tbsp honey and sprinkle generously with 0.25 cup cinnamon sugar. The heat from the waffles will make the honey caramelize slightly, adding that extra layer of sweetness. Stack them high and serve right away—these waffles are best enjoyed warm.
For extra decadence, top with whipped cream, sliced bananas, or a dollop of yogurt. The contrast of the warm, caramelized waffles with cool toppings makes every bite even better. Store any leftovers in an airtight container, but honestly? They won't last that long.
Pro Tips For Making Banana Egg Waffles
- Mash Bananas Thoroughly: Don’t just smash them with a fork—use a potato masher or fork in a bowl and press hard until no lumps remain. I learned this the hard way when my first batch had chewy bits that ruined the texture.
- Preheat Waffle Iron Hot: Crank the iron to its highest setting and let it scream-hot for at least 5 minutes before pouring batter. Cold irons make soggy waffles, and nobody wants that—especially when you’re craving crisp edges.
- Skip Overmixing the Batter: Stir just until the dry ingredients disappear—maybe 10-12 strokes max. Overworking the batter makes waffles dense. I used to whip it like pancake batter, and the result was more like a sad pancake than a waffle.
- Use Room-Temp Eggs: Cold eggs make the batter lumpy and uneven. Crack them into a bowl and let them sit for 10 minutes before mixing. Trust me, your waffles will hold together better, and you’ll avoid that frustrating "why is this so gummy?" moment.
Make-ahead tips for banana egg waffles
Batter Prep Ahead
Mix the batter the night before and store it in an airtight container in the fridge for up to 48 hours. The flavors meld beautifully overnight, and you’ll save time in the morning. Just give it a quick whisk before cooking to restore that smooth consistency. I like to portion the batter into 4 small containers so I can grab just what I need for 2 waffles each morning. 💛
Freezer-Friendly Waffles
Cook fresh waffles, let them cool completely, then stack them with parchment paper between each one. Place the stack in a freezer bag and seal tightly—this prevents freezer burn and keeps them crispy. Reheat in a toaster for 3-4 minutes or an air fryer at 350°F for 5 minutes until golden and warm. I’ve found they reheat best when slightly undercooked before freezing. 🍌
Batch Cooking Tips
Double the recipe and cook all the waffles at once—just keep the iron clean between batches with a damp paper towel. Store the cooked waffles in a single layer on a wire rack to prevent sogginess. For a quick breakfast, reheat them in a skillet over medium heat for 1-2 minutes per side until crispy again. This method works especially well for meal prep on Sundays. ✨
Reheating Perfection
Avoid the microwave—it makes waffles soggy. Instead, use a toaster set to medium heat for 2-3 minutes or an oven at 300°F for 5-7 minutes. For extra crispiness, brush the reheated waffles with a tiny bit of melted butter before serving. I also like to sprinkle them with cinnamon sugar while still warm to revive that bakery-fresh taste. 🔥
Make-Ahead Toppings
Prep toppings the night before to save time. Store honey in a small jar, cinnamon sugar in a shaker, and sliced bananas in a sealed container with a paper towel to absorb moisture. Keep peanut butter or yogurt in the fridge too. When you’re ready to serve, just assemble everything quickly—no last-minute scrambling. This is especially handy for busy weekday mornings. 💡
Long-Term Storage
For waffles you won’t eat within a week, freeze them in a single layer on a baking sheet first. Once frozen solid, transfer them to a freezer bag with parchment between layers. They’ll keep for up to 3 months without losing texture. To serve, reheat directly from frozen—no thawing needed. This is my go-to trick for lazy weekends or unexpected guests. 🍽️
Nutrition facts
Frequently asked questions
Can I make these waffles without eggs?
While eggs are key for structure and fluffiness, you can substitute with 2 tablespoons ground flaxseed mixed with 6 tablespoons water (let sit for 5 minutes to thicken). For a richer texture, try ½ cup applesauce or mashed sweet potato—though the waffles will be denser. These alternatives work best with a slightly longer cook time (5-6 minutes) to achieve crisp edges.
Why did my waffles turn out dense instead of fluffy?
Overmixing the batter or skipping the baking powder are the most common culprits. Always gently fold dry ingredients into wet ones, and make sure your baking powder is fresh (test by mixing with water—it should bubble). Also, check your waffle iron temperature: 350°F is ideal for even cooking. If the batter was too thick, add a splash of milk to restore airiness.
How do I fix waffles that stuck to the iron?
Don't panic! Place the stuck waffle back on the iron and cook for 1-2 more minutes on medium heat. The residual heat will help release it. If it's still stuck, use a butter knife to gently pry it loose—start at the edges and work your way in. To prevent this next time, always grease the iron thoroughly and avoid opening the lid too soon.
Can I use frozen bananas for this recipe?
Thaw the frozen bananas first, then mash them as directed. The texture will be slightly icier, but the waffles will still turn out delicious. For extra creaminess, add 1 tablespoon yogurt or sour cream to the batter. Just be sure to use fully thawed bananas—ice crystals can make the batter watery.
What's the best way to store leftover batter?
Transfer the batter to an airtight container and refrigerate for up to 48 hours. Before cooking, whisk vigorously to restore smoothness. For longer storage, freeze the batter in 1-cup portions—thaw overnight in the fridge before using. Pro tip: Add ½ teaspoon lemon juice to the batter before storing to preserve freshness.